
Table of Contents
- Can You Fix Cracked Fiberglass Tubs? The Short Answer
- Identifying the Type of Crack and Assessing Damage
- DIY Repair Using a Fiberglass Tub Repair Kit
- How to Fix Deep Bathtub Cracks: When DIY Isn’t Enough
- Cost of Professional Bathtub Refinishing vs. DIY Repair
- Safety Considerations: Ventilation, Chemical Exposure, and Respirators
- Post-Repair Maintenance and Long-Term Durability
- Common Mistakes to Avoid When Repairing Fiberglass Tubs
- Frequently Asked Questions
Last Updated: September 30, 2026
Can You Fix Cracked Fiberglass Tubs? The Short Answer
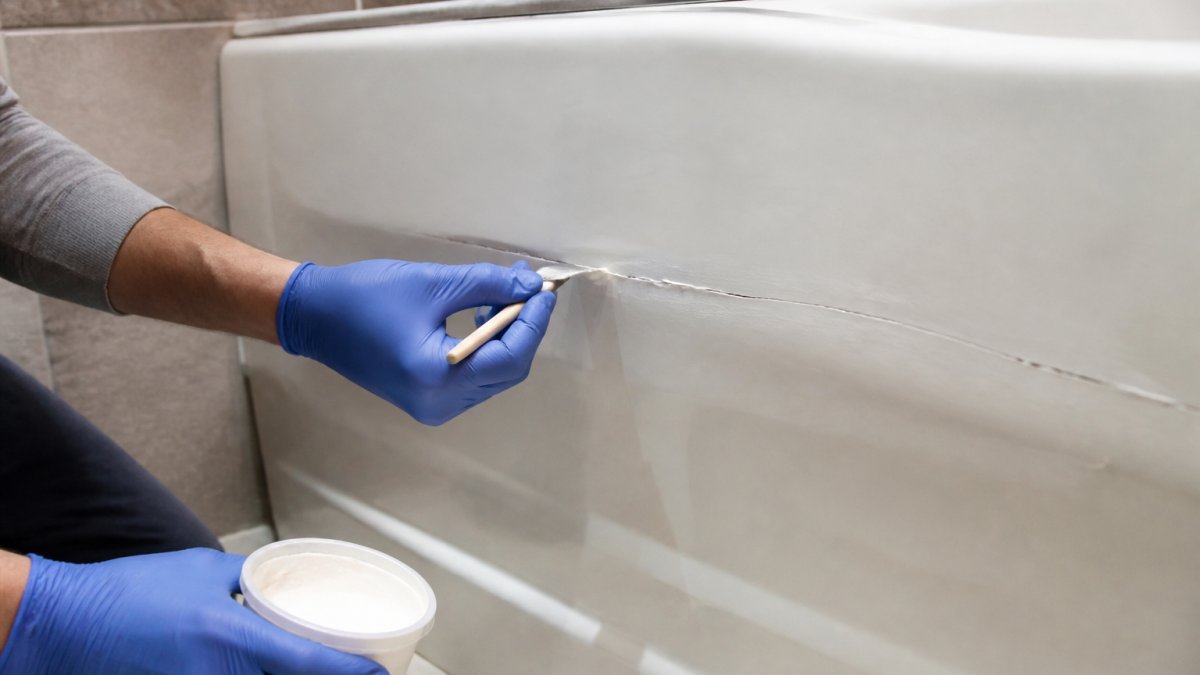
Yes, you can fix cracked fiberglass tubs. Whether you tackle the repair yourself or hire a professional depends on the crack’s severity and your comfort level with DIY projects. Small hairline cracks and surface chips respond well to fiberglass repair kits.
Identifying the Type of Crack and Assessing Damage
Not all cracks are created equal. Some are purely cosmetic; others signal structural problems that demand immediate attention.
Hairline Cracks vs. Stress Cracks
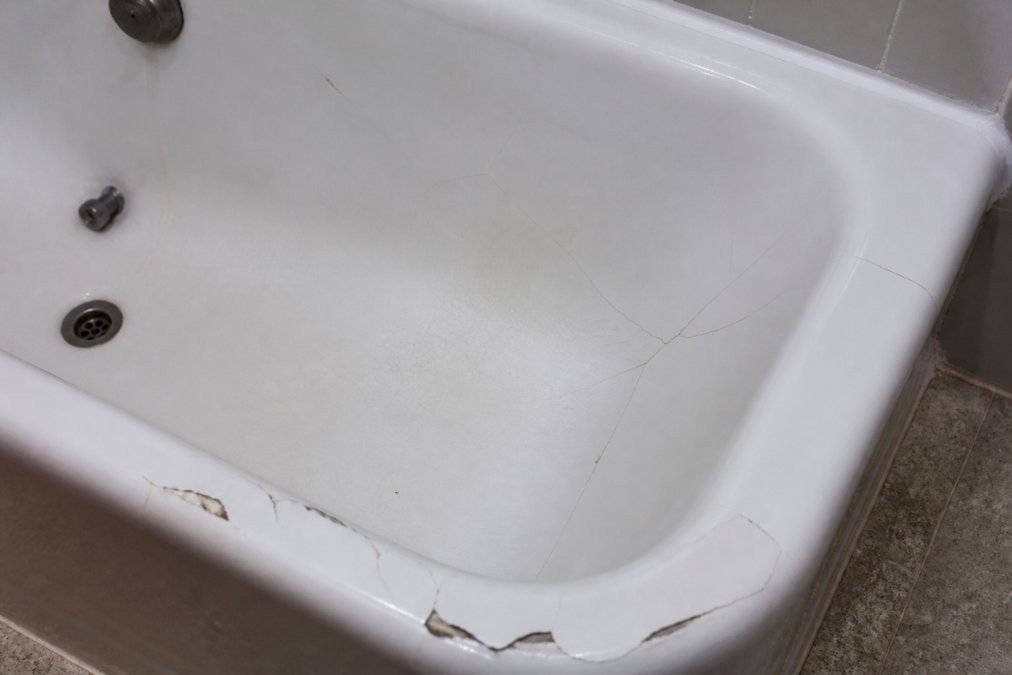
Hairline cracks are thin, spider-web-like fractures on the surface, usually from minor impacts or temperature changes. Stress cracks radiate outward from corners or drains, signaling the tub is flexing under weight. Hairline cracks are cosmetic; stress cracks indicate structural problems requiring professional attention.
Structural Damage vs. Cosmetic Damage
Cosmetic damage (hairline cracks, chips, discoloration) responds well to DIY kits. Structural damage (flexing tub, spreading cracks, water leaks) requires professional assessment. If the tub moves when you step in, water leaks underneath, or cracks keep spreading, you have structural damage that DIY patching won’t fix.
DIY Repair Using a Fiberglass Tub Repair Kit
Fiberglass repair kits contain resin, hardener, and tools for cosmetic damage. The process takes a few hours and costs far less than professional refinishing.
Tools and Materials You’ll Need
Essential items: fiberglass repair kit, 80-grit and 220-grit sandpaper, acetone or degreaser, fiberglass mat, mixing container, brush or roller, gloves, safety glasses, respirator, drop cloth, and polishing compound. Choose kits specifically designed for fiberglass bathtubs; cheap kits fail within months.
Surface Preparation and Cleaning
Clean the area with acetone or degreaser to remove soap, oils, and mildew. Sand with 80-grit sandpaper until the glossy gel coat is gone, extending at least 2 inches beyond the crack. Wipe away all dust with a damp cloth and let dry completely.
Applying Fiberglass Resin and Hardener
Mix resin and hardener per instructions; you have 10-20 minutes before hardening. Apply to the sanded area with a brush, working it into the crack. For deep cracks, lay fiberglass mat first, then apply resin on top.
Sanding, Smoothing, and Finishing
Sand the cured repair with 220-grit sandpaper until level with the surrounding surface. Apply polishing compound and buff to blend seamlessly. Optional: apply waterproof seal for extra protection.
How to Fix Deep Bathtub Cracks: When DIY Isn’t Enough
Deep cracks that penetrate through the fiberglass compromise the underlying structure and allow water to seep into the subfloor, causing rot and mold.
The Role of Structural Support and Expanding Spray Foam
Deep cracks signal inadequate structural support. Professional repair uses expanding spray foam underneath the tub to fill voids and prevent flexing. Without addressing the structural issue, surface repairs are temporary and cracks return.
Void Filling and Load-Bearing Reinforcement
Voids under the tub cause flexing and cracks. Professional repair fills voids with expanding spray foam, creating a solid load-bearing base. Some repairs require fiberglass reinforcement on the underside. This requires professional expertise and equipment.
Cost of Professional Bathtub Refinishing vs. DIY Repair
DIY kits cost $25-$75. Professional refinishing costs more but includes structural assessment, void filling, and warranty coverage. The Tub Guy provides a 5-year warranty and addresses discoloration and stains. For deep cracks or structural damage, professional refinishing can be a more cost-effective solution than repeated DIY attempts.
Safety Considerations: Ventilation, Chemical Exposure, and Respirators
Fiberglass repair kits contain volatile organic compounds (VOCs) that pose real health risks. Understanding what you’re exposed to and how to protect yourself is non-negotiable before you start any DIY repair.
Understanding VOCs in Fiberglass Resin
Polyester resin releases styrene, an EPA-classified hazardous air pollutant that irritates the respiratory system and can cause dizziness, headaches, tremors, and difficulty concentrating. Acetone and solvents release additional VOCs. OSHA limits styrene exposure to 100 ppm over 8 hours; a closed bathroom with one exhaust fan exceeds this within minutes of opening a resin container.
Proper Ventilation Requirements
Minimum ventilation: Open all windows and doors for cross-ventilation. Run the exhaust fan continuously during work and 30 minutes after. If no exhaust fan, use portable fans to pull air out and push fresh air in. If you cannot create adequate cross-ventilation (apartment, no windows), do not attempt this repair indoors.
Correct Respirator Selection
Dust masks do not protect against chemical fumes. Use a half-face or full-face respirator with cartridges rated for organic vapors and styrene specifically (e.g., 3M 6000 series). Disposable cone masks only filter dust. Ensure a proper seal around your nose and mouth.
Complete Personal Protective Equipment (PPE) Checklist
- Respirator with organic vapor cartridges (not a dust mask)
- Nitrile gloves (at least 5 mil; latex is permeable to solvents)
- Safety glasses or face shield
- Long sleeves and pants
- Closed-toe shoes
- Apron or disposable coveralls
Recognizing Overexposure Symptoms
Stop immediately if you experience headache, dizziness, nausea, eye/throat irritation, difficulty concentrating, trembling, or skin rash. These signs indicate inadequate ventilation or failed PPE. Leave the space and reassess your setup.
When to Hire a Professional Instead
Do not attempt this repair if you have asthma, chemical sensitivities, respiratory disease, or are pregnant. If you cannot create adequate ventilation, hire a professional. Professional refinishers typically have industrial-grade ventilation, commercial PPE, and liability insurance.
Post-Repair Maintenance and Long-Term Durability
DIY repairs fail not from poor initial patching but from harsh chemicals or neglect during maintenance.
Cleaning Products to Avoid After Repair
Avoid bleach (breaks down resin), acetone (dissolves resin), abrasive scrubbers (cause delamination), sulfuric acid drain cleaners, undiluted vinegar, and high-concentration peroxide. Safe cleaners: mild dish soap, non-abrasive sponges, fiberglass-safe commercial cleaners, baking soda paste, and dilute vinegar (1:3 ratio).
Moisture Management and Drying
Water is the enemy of fiberglass repairs. Standing water accelerates degradation.
After each use:
- Wipe down the tub with a soft cloth or squeegee, especially around the repair area.
- Leave the bathroom exhaust fan running for 20-30 minutes after bathing to remove humidity.
- If the repair is in the tub floor or a high-splash area, dry it completely after each use.
Temperature Stability
Fiberglass expands and contracts with temperature changes. Rapid temperature swings stress the repair.
- Avoid running very hot water immediately followed by cold water on the repair area.
- Don’t use ice-cold water to rinse a tub that was just filled with hot water.
- In winter, avoid leaving the tub filled with hot water for extended periods, then draining it to expose the cold tub underneath.
Realistic Durability Timelines
Understand what you’re getting with a DIY repair versus professional work.
DIY fiberglass repair kit (cosmetic damage only):
- With excellent maintenance: 2-3 years
- With average maintenance: 1-2 years
- With poor maintenance or harsh chemicals: 6 months to 1 year
Professional fiberglass refinishing (with structural reinforcement):
- With good maintenance: 5-10 years
- With average maintenance: 3-5 years
Periodic Inspection
Check your repair every 3-6 months for signs of breakdown:
- Discoloration or yellowing around the patch (indicates moisture penetration)
- Soft spots when you press on the repair (indicates delamination)
- Cracks appearing at the edges of the repair (indicates the patch is separating)
- Water stains or mold underneath the tub (indicates water is leaking through the repair)
The Cost of Repeated Repairs
Many homeowners attempt DIY repairs, watch them fail within a year, then attempt another repair. After two or three failed attempts, the total cost approaches or exceeds professional refinishing.
- DIY kit: $25-$75
- Failed repair after 1 year: repeat kit ($25-$75) + labor
- Failed repair after another year: repeat kit ($25-$75) + labor
- Total after two failures: $75-$225 + significant time investment
Common Mistakes to Avoid When Repairing Fiberglass Tubs
Most DIY repairs fail because of these preventable mistakes:
- Skipping surface prep. Dust and soap residue prevent bonding. The patch fails within weeks.
- Ignoring structural issues. If the tub flexes, patching the crack is pointless. The crack returns.
- Using cheap kits. Budget repair kits contain low-quality resin that hardens poorly and fails quickly.
- Rushing the cure time. Partial curing creates soft spots. Wait the full recommended time.
- Not sanding smooth. A rough repair is visible and catches dirt. Take time to blend it properly.
- Skipping protective gear. Chemical fumes cause real health problems. Wear a respirator.
- Attempting deep structural repairs as DIY. Deep cracks require professional equipment and expertise.
The most common mistake is not recognizing when a repair is beyond DIY scope. If the crack is deep, spreading, or caused by structural movement, hire a professional.
Frequently Asked Questions
Is it worth repairing a cracked fiberglass bathtub?
Yes, in most cases. Small hairline cracks and moderate stress cracks can be repaired effectively with either a fiberglass tub repair kit or professional refinishing. Repair is typically far less expensive than replacement and can extend your tub’s life by years. However, if the crack is severe, the subfloor is compromised, or the tub is very old, replacement may be more cost-effective. A professional assessment helps determine the best option for your situation.
How long does a fiberglass tub repair last?
DIY repairs using a fiberglass tub repair kit typically last 2-5 years depending on usage and maintenance. Professional refinishing with modern coatings and proper structural support can last significantly longer, potentially 5+ years with proper care. The durability depends on the quality of materials used, how well the crack was prepared and sealed, and whether the underlying structural issue was addressed. Regular maintenance and avoiding abrasive cleaners extends the life of any repair.
Can you fix a crack in a fiberglass tub without replacing it?
Absolutely. Most cracks in fiberglass tubs can be repaired without replacement. Hairline cracks and moderate stress cracks respond well to fiberglass resin patching or professional resurfacing. The key is proper surface preparation, using the right bonding agent, and ensuring any structural support issues are addressed. Deep cracks or cracks caused by flexing due to inadequate support may require expanding spray foam or other reinforcement, but replacement is rarely the only option.
What’s the difference between DIY repair and professional bathtub refinishing?
DIY fiberglass tub repair kits address the visible crack with resin and hardener but may not resolve underlying structural issues. Professional bathtub refinishing typically includes structural assessment, void filling with expanding spray foam, reinforcement of load-bearing areas, and color matching. Professional work includes warranties, uses superior modern materials, and addresses root causes of cracking. Cost reflects these differences, but professional refinishing generally provides longer-lasting results and structural integrity.