A bathroom can look worn out long before it actually needs to be torn apart. Stains, chips, dull tile, and a tub that never looks clean can make the whole room feel older than it is. That is why many homeowners search for bathroom resurfacing step by step before they commit to a full remodel. They want to know what happens, how long it takes, and whether the result will hold up.
The short answer is yes – when the work is done right, resurfacing can make a tired bathroom look fresh again without the cost, demolition, and downtime of replacement. But the process matters. Prep matters. Materials matter. And the skill of the person doing the work matters most.
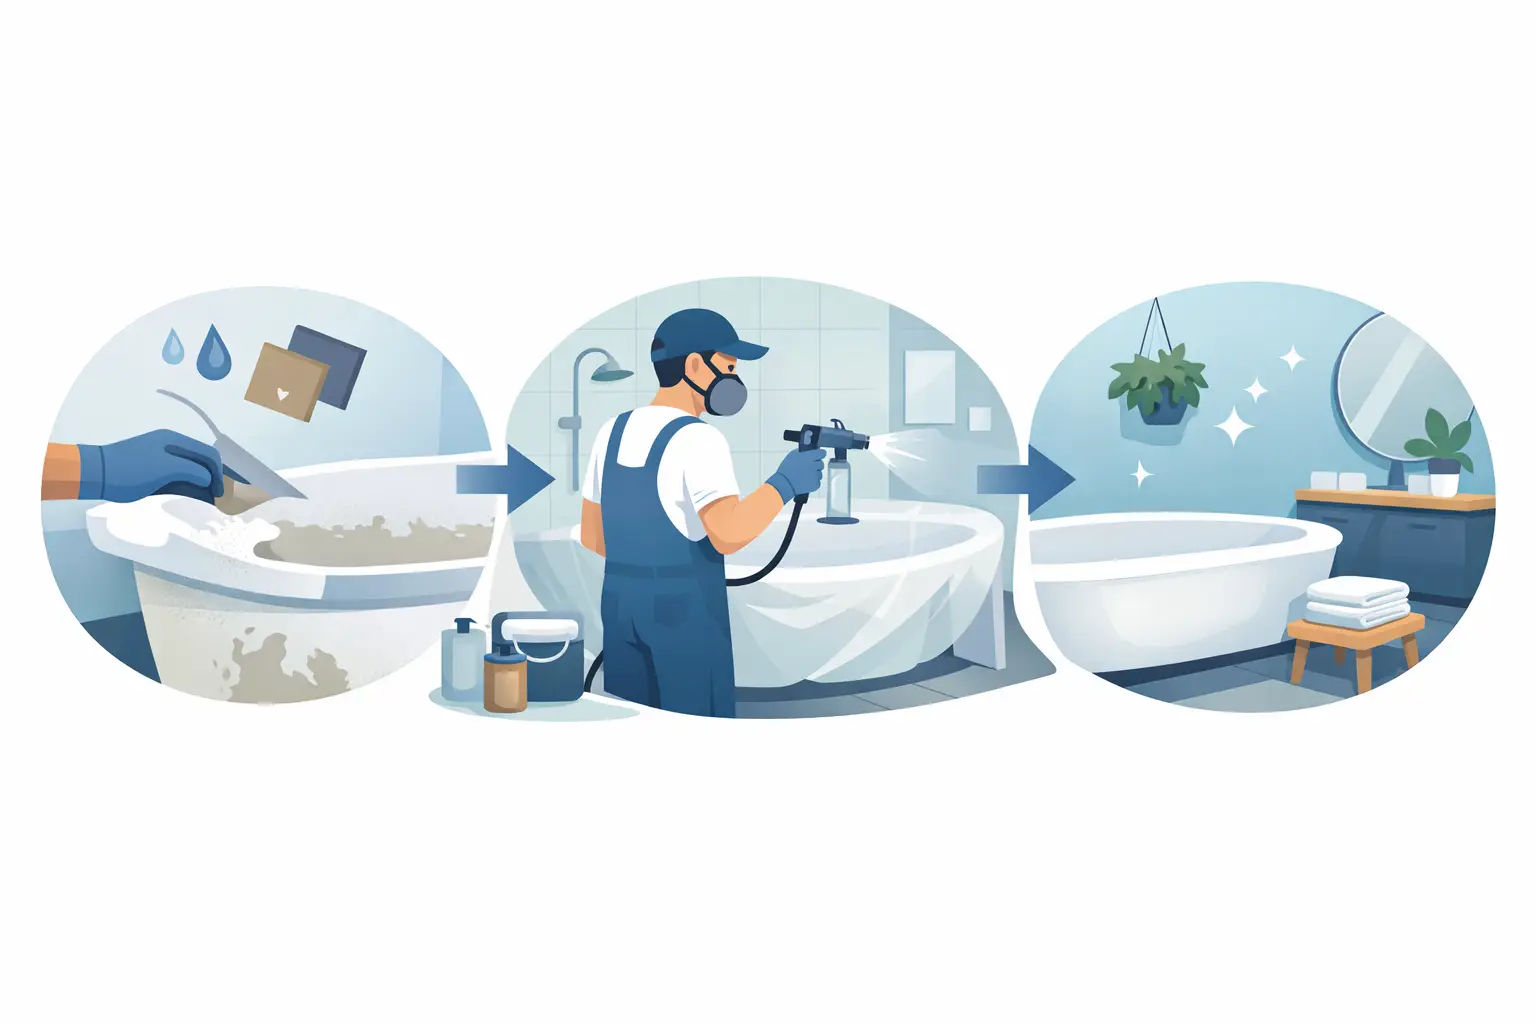
What bathroom resurfacing really means
Bathroom resurfacing is the process of repairing and refinishing existing surfaces instead of ripping them out. That can include bathtubs, wall tile, shower pans, sinks, countertops, and sometimes even cabinets. The goal is simple. Keep what still works structurally, fix what looks worn, and apply a new finish that looks clean, smooth, and updated.
For many Florida homeowners, that is the sweet spot. You get a visible transformation without turning your house into a construction zone for weeks.
Still, resurfacing is not the right fit for every bathroom. If there is major water damage, rotted subfloors, failing plumbing behind the walls, or loose tile throughout, replacement may make more sense. Resurfacing works best when the surfaces are solid but the finish is dated, stained, chipped, or hard to clean.
Bathroom resurfacing step by step
If you have never seen the process, it helps to break it down. A professional job follows a clear order. Skipping steps is where cheap work starts to fail.
Step 1: Inspect the surface
The first step is always evaluation. A pro checks the tub, tile, shower, or sink for cracks, rust, chips, caulking problems, heavy buildup, and previous coating failure. This is where you find out whether the surface can be resurfaced or whether it is too far gone.
This step also sets expectations. A heavily damaged tub can often be repaired and refinished, but if the base is flexing or rust has eaten through the metal, resurfacing may not last the way you want.
Step 2: Remove buildup and deep-clean the area
Bathrooms collect soap scum, body oils, hard water deposits, cleaners, and silicone residue. All of that has to go. The surface is cleaned with professional products that strip away contamination. This is not basic household cleaning. It is surface preparation for adhesion.
If residue is left behind, the new coating may not bond properly. That can lead to peeling, blistering, or dull spots later.
Step 3: Strip failed coatings if needed
Not every bathroom surface is original. Some tubs and tile have already been painted or refinished in the past. If that old finish is peeling, lifting, or uneven, it usually has to be removed before a new finish goes on.
This can add time to the job, but it is often necessary. New coatings are only as strong as the layer underneath them.
Step 4: Repair chips, cracks, and surface damage
Once the surface is clean, damaged areas are repaired. That might mean filling chips in a porcelain tub, smoothing pitted spots, fixing minor cracks, or correcting worn areas around the drain or soap dish.
This is one of the most overlooked parts of the process. A finish can only look as good as the surface below it. If repairs are rushed, you will see it later.
Step 5: Etch or sand for adhesion
The surface then gets mechanically or chemically prepared so the new coating can grip properly. Depending on the material, that may involve sanding, etching, or both. Glossy surfaces need tooth. Smooth does not mean ready.
This is also where a professional protects the areas around the work zone. Floors, walls, fixtures, mirrors, and hardware need to be masked off carefully so only the intended surface gets coated.
Step 6: Apply bonding agents and primer
After prep, a bonding layer or primer is applied. This helps create a strong connection between the old surface and the new topcoat. Different materials need different systems. A cast iron tub is not treated the same as cultured marble or ceramic tile.
This is one reason resurfacing is not a one-size-fits-all job. The right coating system depends on what is being refinished and how it is used.
Step 7: Spray the new finish
This is the part homeowners notice most. The topcoat is sprayed on in controlled, even passes to create a smooth, glossy new surface. This can restore the original look or change the color entirely, depending on the project.
A good finish should look clean and uniform. It should not have heavy texture, roller marks, drips, or rough overspray. If it does, something went wrong in prep, product choice, or application.
Step 8: Cure and re-caulk
After the coating is applied, it needs time to cure. Dry to the touch is not the same as fully ready for use. Cure times vary based on product, humidity, ventilation, and the type of surface being refinished.
Once the finish is ready, the area is re-caulked where needed. Clean caulk lines make a big difference in the final look.
Step 9: Final walkthrough and care instructions
A professional should inspect the finished surface, confirm the look is even, and explain how to care for it. This part matters. Resurfaced bathrooms are durable, but they are not maintenance-free.
Harsh cleaners, suction-cup mats, and abrasive scrubbing can shorten the life of the finish. Homeowners should know exactly what to use and what to avoid.
How long does bathroom resurfacing take?
Most resurfacing jobs are much faster than replacement. A tub or sink can often be done in a day. A larger bathroom with tile walls, a shower, vanity top, and multiple repairs may take longer.
The big advantage is not just labor time. It is avoiding demolition, plumbing disconnects, tile tear-out, dust, dumpster fees, and the chain reaction that happens when one replacement leads to three more.
That said, fast does not mean rushed. Proper prep and curing still take time. If someone promises a perfect finish with almost no prep, that is a red flag.
What makes resurfacing last
Homeowners usually ask one thing first. How long will it hold up?
That depends on the condition of the surface, the coating system, and the quality of the work. It also depends on how the bathroom is used. A guest bath sees less wear than a daily-use family bathroom. A shower used by one adult is different from a rental property with constant turnover.
Good workmanship is what gives resurfacing its value. Done right, it can hold up for years and save a lot of money over replacement. Done poorly, it can fail early and cost more in the long run.
That is why warranty matters. A company willing to stand behind the finish is telling you they trust their prep, materials, and process.
When resurfacing is better than replacement
Resurfacing makes the most sense when the bathroom is ugly, worn, outdated, or lightly damaged – but still functional. If the tub is solid, the tile is stable, and the layout works, refinishing can deliver a major visual upgrade without the price tag of a remodel.
It is also a smart move when you want a color change. An old pink, almond, or off-white tub can be updated to a cleaner modern finish without removing it.
Replacement still has its place. If a fixture is broken beyond repair, leaking, unstable, or part of a larger renovation plan, new materials may be the better route. The key is being honest about the condition of the room, not forcing the wrong solution.
What homeowners should ask before hiring anyone
Not all resurfacing work is equal. Before you hire a company, ask what surfaces they refinish, how they handle repairs, what kind of coating system they use, how long the finish needs to cure, and what warranty is included.
You should also ask who is actually doing the work. Experience matters here. Resurfacing is part repair, part prep, and part finish work. It is not just spraying on a shiny coating and hoping for the best.
If you are in Florida and want to avoid a costly bathroom teardown, a specialist like The Tub Guy can be the practical middle ground. You keep the bathroom you have, fix what looks tired, and get a clean updated finish without weeks of disruption.
Bathroom resurfacing is not flashy. It is just smart when the surfaces are still worth saving. If your bathroom works but looks worn out, the right refinishing job can give you the reset you wanted without turning your home upside down.